Make A Pilaster Fit A Room
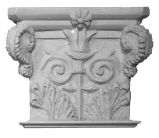
Back to guidesThis guide shows you how a pilaster with its pedestal and capital can be made to fit any room (Pic 1). The pilaster can be made longer or height can be added to the pedestal.

Option 1: Making the pedestal higher:
When adding height to a pedestal, you can either hide the addition or make a feature of it (Pic 2). The process is the same for both.

Step 1:
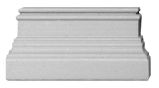
Measure the distance that needs to be filled (Pic 3) and then measure the base of the pedestal. Next, to create a hidden addition, cut pieces of MDF that are the same size as the pedestal in width and depth. (Pic 4). The height of these pieces must be the same as the distance that needs to be filled.


To make a feature of the addition, make the MDF block 2mm wider (1/16”) and 1mm deeper (1.32”) than the base of the pedestal (Pic 5). When they’re cut, make sure that the blocks fit the pedestal and take up the missing height.

Step 2:
Superglue the blocks to the pedestals (Pic 6) and seal the MDF blocks by giving them two coats of button polish (wait for the first coat to dry before applying the second) which can be bought from DIY shops. Alternatively, you can use French polish or knotting sealer. When the polish has dried, rub it down with 250 grit paper until the surfaces are smooth – especially at the ends.

Step 3:
Carefully fill in any gaps between the pedestal and the MDF using car body filler (Pic 7). When the filler is set, rub it down so it remains in the gaps only (Pic 8).


Step 4:
Mount all of the mouldings onto a spraying stick (Pic 9) and spray with white car primer. You will need to apply several light coats for a total coverage (allow the primer to dry between coats). Don’t spray too much or it’ll puddle and run.

Step 5:
When the primer has dried, make sure there are no gaps and fill them in if you find any (it’s fine to use filler over primer at this stage) as it’s easier to spot gaps once primer has been applied. Rub down and respray if you need to add any more filler. Now the mouldings are ready to be painted in the medium of your choice (Pic 10).

Option 2: Extending the pedestal:
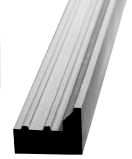
This option requires an extra pilaster which can be cannibalised to extend the others.
Step 1:
Measure the distance that needs to be filled (Pic 11).

Step 2:
Cut the bottom off the pilaster being used as the insert. To do this, mark around the moulding using a square and pencil (Pic 12) and, placing the moulding on a bench hook, remove the bottom with a razor saw (Pics 13 & 14).


Step 3:
Measure and mark the amount required to make up the difference on the spare moulding and cut this off (Pic 15).

Step 4:
Cut the pilaster which you wish to lengthen in two, ready to insert the extension piece. Try a dry fit first to make sure the extended pilaster with its capital and pedestal is now the right size (Pics 16 & 17). Once you are satisfied with the fit, glue them together with super glue. When gluing items together make sure they are straight by holding them against a straight edge (Pic 18) on a flat surface.


Step 5:
Lightly spray with white primer to show where any filling may be required. For large gaps use car body filler, but for hair line gaps you can use a correction fluid (Pic 19).

Step 6:
Once the filler has hardened completely, carefully rub it down with 250 grit paper, making sure not to damage any detail on the pilaster.
Step 7:
Now lightly spray with white primer. Once dry, check there are no gaps, if there are, fill these in. Rub down and spray again. Repeat this process until the joint cannot be seen (Pics 20 & 21).


Step 8:
Mount all the mouldings onto a spraying stick (Pic 22) and spray with white primer. When the primer is dry the mouldings can be painted in a medium and method of your choice (Pic 23).